Red light nm ocular eye shield: your complete guide to safe eye protection
Everything you need to know about choosing and using red light ocular shields for safe photobiomodulation therapy. Expert guidance on wavelengths, protection levels, and proper use.
You're about to use your red light therapy device. You stand there, panel glowing. And then it hits you: should I be protecting my eyes?
It's a smart question.
Red light therapy works by flooding your cells with specific wavelengths of light. These wavelengths penetrate deep. They boost mitochondrial function, reduce inflammation, and speed up healing. But your eyes? They're delicate. They're not designed to handle direct exposure to high-powered LED panels at close range.
That's where red light nm ocular eye shields come in.
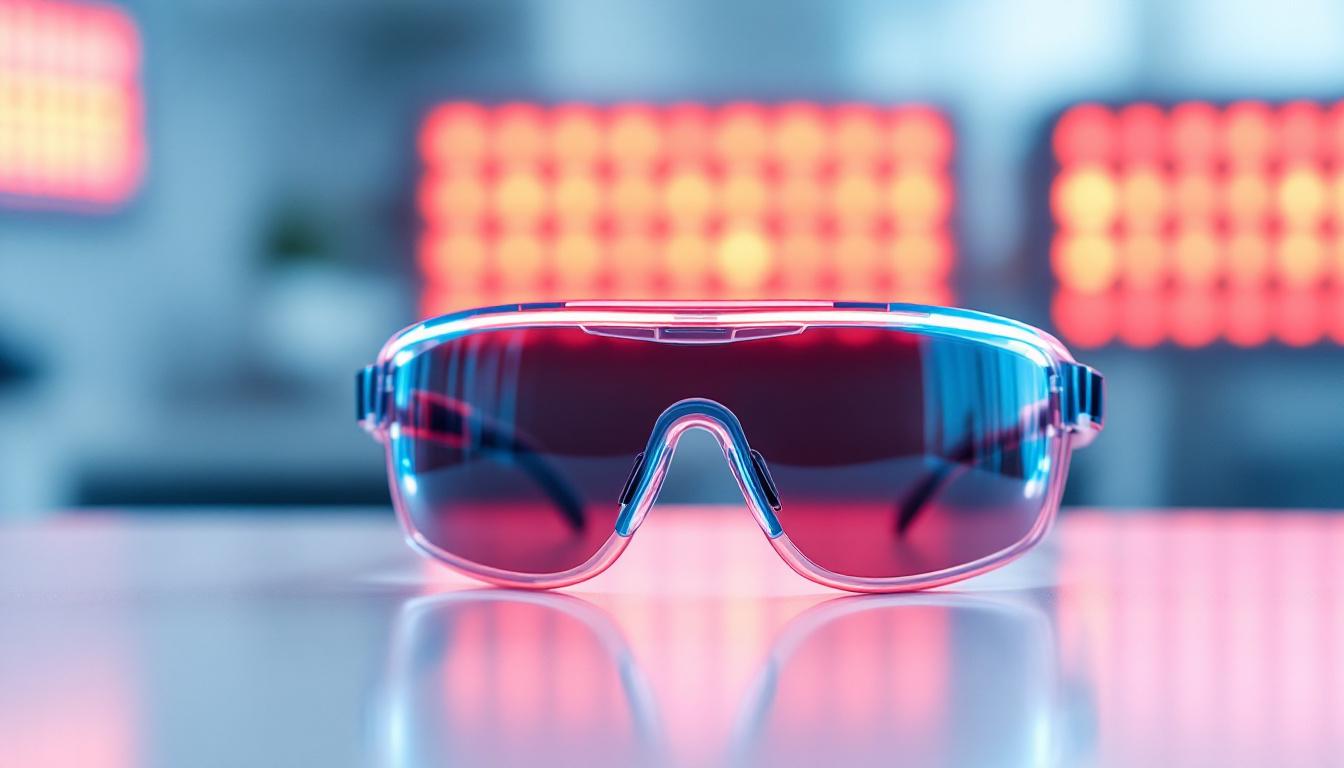
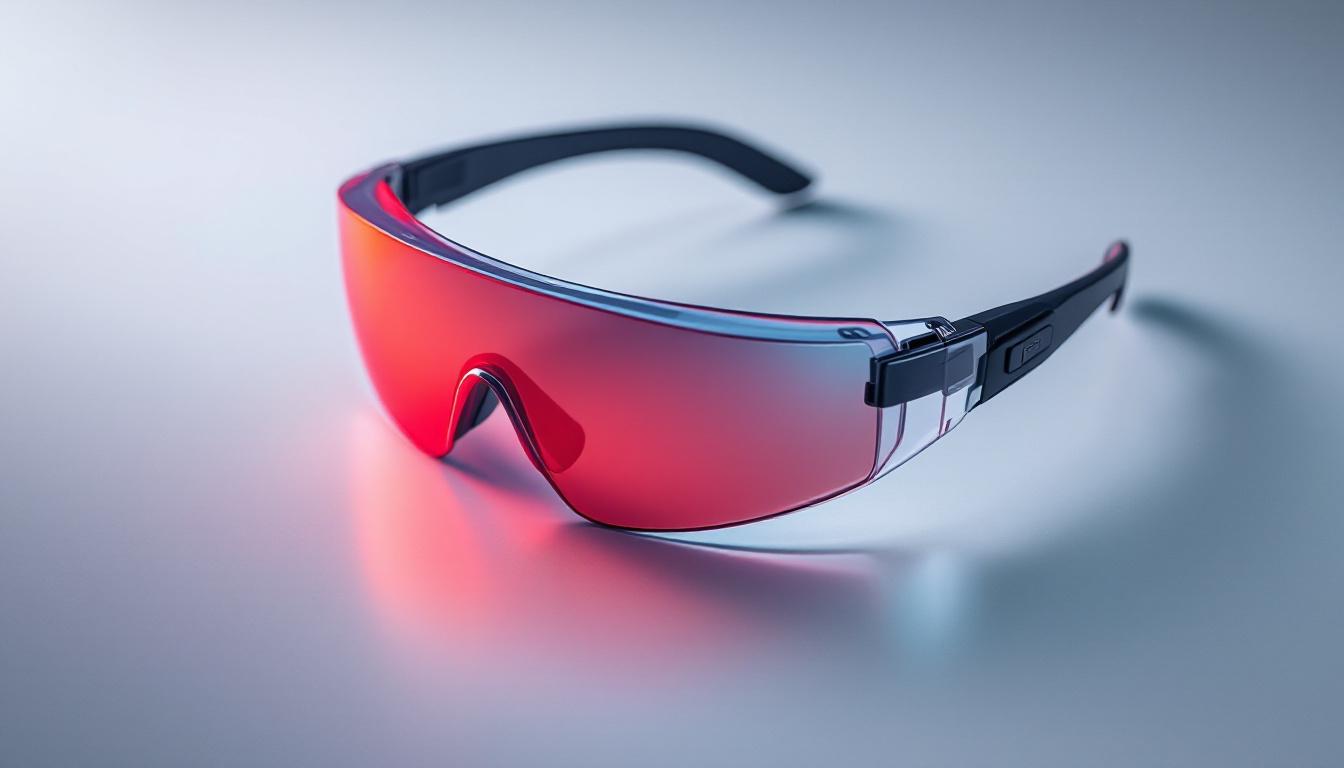
These aren't your regular sunglasses. They're not welding goggles either. They're specialized protective eyewear designed specifically for photobiomodulation therapy. They block the intense light from red and near-infrared LEDs while still letting you see what you're doing.
But here's the thing: not all eye shields are created equal. Some block too much. Some block too little. Some are designed for 660nm wavelengths but fail miserably at 850nm. And some are just rebranded safety glasses with fancy marketing.
This guide cuts through the confusion. You'll learn which wavelengths need protection, what optical density actually means, how to choose the right shield for your device, and when you absolutely need eye protection versus when you can skip it.
Let's get into it.
Table of Contents
- Do you really need eye protection for red light therapy?
- Understanding wavelengths and eye safety
- What makes a proper red light ocular shield
- Optical density explained
- Different types of eye protection
- Choosing the right shield for your wavelengths
- Popular red light eye shield options
- How to properly use ocular shields
- Common mistakes to avoid
- When you can skip eye protection
- DIY vs commercial eye shields
- Maintenance and care
- Cost breakdown
- Signs you need better protection
Do you really need eye protection for red light therapy? {#do-you-need-protection}
Short answer: it depends.
Long answer: it depends on what you're treating, how close you are to the panel, how powerful your device is, and whether you're looking directly at the LEDs.
Let's break this down.
If you're treating your face, you're going to have a powerful LED panel 6 to 12 inches from your eyes. The light is bright. Really bright. Even with your eyes closed, your eyelids don't block enough light to protect your retinas from prolonged exposure. This is when you need protection.
If you're treating your back, your knees, or your shoulder, your eyes aren't in the direct beam path. You're fine. No protection needed.
The FDA doesn't require eye protection for red light therapy devices marketed for home use. That's because most home devices operate at safe power levels. But safe doesn't mean comfortable. And comfortable doesn't mean optimal.
Here's what the research shows:
A study in Photomedicine and Laser Surgery found that direct exposure to 850nm near-infrared light at 100 mW/cm² for 20 minutes caused temporary retinal stress in animal models. Not permanent damage, but stress. The retinal cells recovered within 24 hours, but why risk it?
Another study in Investigative Ophthalmology & Visual Science demonstrated that high-intensity red light (660nm) at close range can disrupt your circadian rhythm if absorbed through the eyes at the wrong time of day. Not dangerous, but definitely not what you want if you're doing a morning session.
Professional clinics always use eye protection. Always. Even when treating areas far from the face. Why? Because stray reflections happen. Light bounces off walls, mirrors, jewelry. And cumulative exposure adds up over weeks and months of regular treatments.
So do you need eye protection?
You need it when treating your face, scalp, or neck. You probably don't need it when treating your torso, limbs, or back. But even then, it's smart to have a pair within reach just in case.
Understanding wavelengths and eye safety {#wavelengths-and-safety}
Not all wavelengths affect your eyes the same way.
Red light therapy typically uses two wavelength ranges: 630-680nm (visible red) and 810-850nm (near-infrared, invisible to the naked eye). Your eyes respond differently to each.
Visible red light (630-680nm)
This is the light you can see. It's bright red. It's intense. It makes you squint.
When visible red light hits your eyes, your pupils constrict naturally. That's your body's defense mechanism. It works pretty well for ambient red light, but not so well for high-powered LED panels at close range.
The main concern with visible red light isn't retinal damage, it's photostress. Your photoreceptors get overwhelmed. Your eyes feel fatigued. You might see afterimages or spots when you close your eyes. It's temporary, but annoying.
Studies show that prolonged exposure to bright red light can interfere with melatonin production if it happens in the evening. Your brain interprets bright light as "daytime" and suppresses melatonin accordingly. Not ideal if you're doing a bedtime session.
Near-infrared light (810-850nm)
This is the invisible stuff. You can't see it. Your pupils don't react to it. And that's the problem.
Without the natural pupil constriction response, near-infrared light enters your eye unrestricted. It passes through your cornea and lens. It reaches your retina at full intensity.
Near-infrared light penetrates deeper than visible red. It can reach the retinal pigment epithelium, the layer of cells that supports your photoreceptors. Prolonged exposure at high intensities can cause thermal stress in these cells.
The good news: most home red light devices operate at safe power levels (30-100 mW/cm²). The bad news: if you're using a commercial-grade panel or stacking multiple devices, you can easily exceed safe exposure limits.
A 2018 study in Journal of Biophotonics found that 850nm light at 150 mW/cm² for 15 minutes caused measurable but reversible changes in retinal cell metabolism. The cells recovered, but the takeaway is clear: high-intensity NIR deserves respect.
Combination wavelength devices
Most modern red light panels use both 660nm and 850nm LEDs in the same device. Some are in a 1:1 ratio. Some are 2:1 or 3:1.
This creates a unique challenge for eye protection. You need a shield that blocks both visible red and invisible near-infrared. Not all shields do both effectively.
Regular tinted safety glasses might block 660nm red light but let 850nm NIR pass right through. Laser safety goggles designed for 650nm lasers won't protect you from 850nm LEDs.
You need a shield specifically rated for both wavelength ranges. That's what "nm ocular shield" refers to in product descriptions. The "nm" tells you which wavelengths it's designed to block.
What makes a proper red light ocular shield {#proper-ocular-shield}
A proper red light ocular shield isn't just tinted plastic. It's engineered optical filtering.
Here's what separates a real ocular shield from cheap knockoffs:
Wavelength-specific filtering
The shield must block the exact wavelengths your device emits. If your panel uses 660nm and 850nm LEDs, your shield needs optical density (OD) ratings for both wavelengths.
Most quality shields will specify their OD ratings like this:
- OD 4+ at 600-700nm (visible red)
- OD 5+ at 800-900nm (near-infrared)
These numbers matter. We'll get into optical density in the next section.
Wrap-around design
Light doesn't just enter your eyes from the front. It comes in from the sides, top, and bottom.
A proper shield wraps around your face. It extends past your temples. It sits close to your eyebrows and cheeks without gaps. Some even have foam padding to block stray light completely.
Think of it like sunglasses versus safety goggles. Sunglasses look cool but let light leak in from every angle. Safety goggles look dorky but actually protect your eyes.
For red light therapy, you want the dorky option.
Optical clarity
Here's the paradox: the shield needs to block intense light while still letting you see.
High-quality shields use precision optical filtering. They block specific wavelengths while transmitting others. This means you can read your timer, adjust your position, or check your phone without taking the shield off.
Cheap shields just use dark tinting. They block everything. You're essentially blind. That's not just inconvenient, it's dangerous. You can't see the power button, the timer, or whether your panel is overheating.
Material durability
Red light shields take abuse. They get dropped. They get cleaned with harsh chemicals. They get stored in hot cars and cold basements.
Polycarbonate lenses are standard. They're impact-resistant and scratch-resistant. They don't yellow or degrade under UV exposure.
The frame should be flexible enough to fit different face shapes but rigid enough to maintain its wrap-around shape. Cheap frames crack. Good frames bend and bounce back.
Comfort for extended wear
A typical red light session lasts 10 to 20 minutes. That doesn't sound long, but try wearing uncomfortable goggles for 20 minutes. It's torture.
Weight matters. Padding matters. Adjustable straps matter. Nose bridge fit matters.
Professional-grade shields weigh 40 to 80 grams. They distribute weight across your forehead and temples, not your nose. They have foam padding that doesn't irritate your skin. They have adjustable elastic straps that don't pull your hair.
You should forget you're wearing them. If you're constantly aware of the shield, it's not the right one.
Optical density explained {#optical-density}
Optical density sounds complicated. It's not.
OD is just a measure of how much light the shield blocks. Higher numbers mean more blocking power.
Here's the formula:
OD = log₁₀(incident light / transmitted light)
Don't worry about the math. Just know this:
- OD 1 = blocks 90% of light (lets 10% through)
- OD 2 = blocks 99% of light (lets 1% through)
- OD 3 = blocks 99.9% of light (lets 0.1% through)
- OD 4 = blocks 99.99% of light (lets 0.01% through)
- OD 5 = blocks 99.999% of light (lets 0.001% through)
Each additional OD number blocks 90% of the remaining light.
For red light therapy, you want:
- OD 3-4 for visible red (630-680nm)
- OD 4-5 for near-infrared (810-850nm)
Why the difference? Because NIR is invisible. You can't sense it. You can't blink or look away instinctively. So you need higher protection.
How OD ratings are tested
Reputable manufacturers test their shields with a spectrophotometer. This device measures exactly how much light at each wavelength passes through the lens.
They'll publish a transmission curve showing OD across the entire spectrum. It looks like a graph with wavelength on the X-axis and OD on the Y-axis.
Look for this graph before buying. If a company just says "blocks red light" without specific OD ratings, run away. They're selling tinted plastic, not engineered optical filters.
Common OD rating mistakes
Some shields list a single OD rating, like "OD 6." That's meaningless without a wavelength range.
A shield might have OD 6 at 532nm (green lasers) but OD 1 at 660nm (red light therapy). The single OD 6 number looks impressive but tells you nothing about red light protection.
Always check the OD rating at the specific wavelengths your device uses.
If your panel is 660nm + 850nm, you need OD ratings for both. Not an average. Not a single number. Both.
Different types of eye protection {#types-of-protection}
You've got options. Too many options. Let's sort through them.
Specialty red light goggles
These are purpose-built for photobiomodulation therapy. They're designed specifically for 630-850nm wavelengths.
Pros:
- Wavelength-specific filtering
- High OD ratings (4-6)
- Wrap-around design
- Usually comfortable for extended wear
- Allow some visible light through so you can see
Cons:
- Expensive ($40-100)
- Single-purpose (you won't use them for anything else)
- Can be bulky
Best for: facial treatments, full-body panel use, professional clinic use
Laser safety glasses (red spectrum)
These are designed for laser technicians working with red and NIR lasers. They offer excellent protection but come with trade-offs.
Pros:
- Very high OD ratings (5-7)
- Rigorously tested
- Durable construction
- Side shields standard
Cons:
- Often completely opaque (you can't see through them)
- Designed for laser wavelengths, not LED arrays
- Expensive ($60-150)
- Uncomfortable for long wear
Best for: extremely high-powered devices, professional use when working around Class 3B or 4 lasers
Tinted safety glasses
These are standard industrial safety glasses with red or orange tinting. Cheap. Available everywhere.
Pros:
- Inexpensive ($10-30)
- Comfortable
- Impact-rated
- Available at hardware stores
Cons:
- Low OD ratings (1-2)
- Not wavelength-specific
- Poor NIR protection
- Don't wrap around
Best for: low-power devices, treatments away from the face, supplementary protection
Blue light blocking glasses (red lenses)
These are marketed for computer use but some people try using them for red light therapy.
Don't.
Blue blocking glasses filter 400-500nm light (blue). They do almost nothing at 660nm and absolutely nothing at 850nm.
The red tint fools people into thinking they block red light. They don't. They're designed to block blue while transmitting red. Opposite of what you need.
Closed eyes + towel
The budget option. Close your eyes and drape a towel over your face.
Pros:
- Free
- Always available
- Better than nothing
Cons:
- Your eyelids only provide OD 1-2 protection
- Towel positioning is inconsistent
- Can't see your timer or device
- Risk of accidentally opening your eyes
- NIR penetrates both eyelids and towel
Best for: emergency backup when you forgot your goggles
Choosing the right shield for your wavelengths {#choosing-right-shield}
Your device determines your shield.
Step one: check your device specifications. What wavelengths does it emit?
Common combinations:
- 660nm only
- 850nm only
- 660nm + 850nm (dual wavelength)
- 630nm + 660nm + 850nm (tri wavelength)
- 660nm + 810nm + 850nm
Write these numbers down. You'll need them.
Step two: check your device's power output. Look for irradiance specs, measured in mW/cm².
- Low power: 10-30 mW/cm²
- Medium power: 30-70 mW/cm²
- High power: 70-150 mW/cm²
- Very high power: 150+ mW/cm²
Higher power needs higher OD protection.
Step three: determine your treatment distance.
- Close range: 0-6 inches
- Medium range: 6-12 inches
- Far range: 12-24 inches
- Body panel distance: 24+ inches
Closer distance needs higher OD protection.
Matching OD to your setup
Here's a practical guide:
Low power device (30 mW/cm²) at medium range (6-12 inches):
- OD 3 at 660nm
- OD 4 at 850nm
Medium power device (50 mW/cm²) at close range (6 inches):
- OD 4 at 660nm
- OD 5 at 850nm
High power device (100 mW/cm²) at close range (6 inches):
- OD 5 at 660nm
- OD 6 at 850nm
Professional panel (150+ mW/cm²) at any distance:
- OD 6+ at all wavelengths
When in doubt, go higher. There's no downside to extra protection except reduced ambient light visibility.
Single vs dual wavelength considerations
If your device only emits 660nm, you only need protection for visible red. You can use a simpler, cheaper shield.
If your device emits both 660nm and 850nm, you need dual-spectrum protection. The shield must block both visible red and near-infrared. This narrows your options significantly.
Most commercial red light panels use dual wavelengths. So most users need dual-spectrum shields.
Reading the spec sheet
Quality eye shields come with a spectral transmission chart. It looks like a line graph.
The X-axis shows wavelength (400nm to 1000nm). The Y-axis shows transmission percentage (0% to 100%) or optical density (0 to 7).
Find your device wavelengths on the X-axis. Check the corresponding Y-axis value.
For a 660nm + 850nm device, you want to see:
- Less than 0.01% transmission at 660nm (OD 4+)
- Less than 0.001% transmission at 850nm (OD 5+)
If the company doesn't provide this chart, email them and ask for it. If they can't provide it, don't buy their shield.
Popular red light eye shield options {#popular-options}
Let's look at what's actually available and working for real users.
Red light therapy-specific goggles
Red Therapy Co. Eye Shields
- OD 4+ at 630-680nm
- OD 5+ at 800-900nm
- Wrap-around design with side shields
- Adjustable elastic strap
- Foam padding
- Cost: $45-60
- Best for: dual wavelength home panels
These are the most common recommendation in red light forums. They're comfortable, effective, and reasonably priced. The wrap-around design actually stays put during face treatments.
BlockBlueLight Red/NIR Goggles
- OD 5 at 630-680nm
- OD 6 at 810-870nm
- Full coverage design
- Replaceable foam padding
- Cost: $65-85
- Best for: high-power devices, professional use
These offer higher protection levels but are bulkier. If you're using a commercial-grade panel, the extra protection is worth the reduced comfort.
Ra Optics Red Light Shield
- OD 4 at 660nm
- OD 5 at 850nm
- Lightweight frame
- Minimal side coverage
- Cost: $75-95
- Best for: low-to-medium power devices, users who prioritize comfort
These look more like regular glasses than goggles. Less dorky, but also less protective from stray angles.
Laser safety glasses adapted for red light
Laser Safety Industries 630-900nm Goggles
- OD 6+ across entire red/NIR spectrum
- Industrial-grade construction
- Side shields
- Anti-fog coating
- Cost: $80-120
- Best for: maximum protection, commercial settings
These are overkill for most home users but if you're running a professional practice or using multiple high-power panels, the extra protection and durability justify the cost.
Budget-friendly options
Uvex S0360X Ultra-spec 2000 with red lens
- OD 2-3 at 660nm
- OD 1-2 at 850nm
- Basic side shields
- ANSI Z87.1 impact rated
- Cost: $15-25
- Best for: low-power devices, supplementary protection
These are standard safety glasses with red-tinted lenses. They don't offer premium protection but they're better than nothing. Good starter option if you're not sure you need eye protection.
What to avoid
Generic "blue light blocking" glasses with red lenses: These block blue, not red. Marketing is misleading.
Welding glasses shade 2-3: Wrong wavelength range. Designed for arc welding UV, not LED red/NIR.
Pink or amber tinted fashion sunglasses: Cosmetic tint only. Zero meaningful protection.
Anything without specified OD ratings: If they won't tell you the OD, assume it's inadequate.
How to properly use ocular shields {#proper-use}
Having the right shield is half the battle. Using it correctly is the other half.
Before your session
Inspect your shield. Check for scratches, cracks, or degraded foam padding. Even small scratches can create focal points where light concentrates.
Clean the lenses. Dust and smudges scatter light in unpredictable ways. Use an optical cleaning solution and microfiber cloth. Don't use paper towels or your shirt.
Adjust the fit. The shield should sit snug against your face without gaps but not so tight it causes pressure points. Adjust straps before starting your session, not during.
During your session
Put the shield on before turning on your device. Don't turn on the panel then scramble to find your goggles.
Position yourself at your intended treatment distance before activating the LEDs. Moving closer or farther while the panel is on changes your exposure intensity.
Keep your eyes closed even with the shield on. The shield handles the high-intensity light, but closing your eyes adds an extra layer of protection and makes the session more relaxing.
Don't look directly at the LEDs. Even with protection, it's not comfortable and there's no benefit. Face toward the panel but keep your gaze neutral or downward.
After your session
Remove the shield after turning off the device. Let your eyes adjust to normal lighting gradually.
If you see afterimages or spots, you were either not wearing the shield, it wasn't positioned correctly, or you need higher OD protection.
Clean the shield after each use. Sweat, oils, and skincare products degrade lens coatings over time.
Store the shield in a protective case. Don't toss it in a drawer or leave it sitting on top of your panel.
Session frequency considerations
If you're doing daily treatments, you're accumulating exposure. Even with proper eye protection, it's worth taking occasional breaks.
Consider doing a 5-day-on, 2-day-off schedule. This gives your eyes time to fully recover from any subclinical photostress.
Alternate treatment areas when possible. If you did face Monday, do shoulders Tuesday, back Wednesday, etc. This naturally reduces cumulative eye exposure.
Multiple device setups
Some users stack multiple panels or use full-body light beds. This multiplies light intensity from multiple angles.
Standard wrap-around shields aren't enough for 360-degree exposure. You need either:
- Full-coverage goggles with no gaps
- A blindfold-style shield
- Or keep your eyes completely covered and outside the primary beam paths
Professional light beds usually have built-in eye protection zones or require medical-grade eye shields.
Common mistakes to avoid {#common-mistakes}
Let's talk about what goes wrong.
Mistake #1: Using the wrong shield for your wavelength
You bought goggles designed for 532nm green lasers because they were cheap. Your panel emits 660nm + 850nm. The goggles do nothing.
Always match your shield to your device wavelengths. Check the spectral chart. Verify the OD ratings at your specific wavelengths.
Mistake #2: Gaps around the edges
Your shield has great OD ratings but it doesn't wrap around your face properly. Light leaks in from the sides, top, and bottom.
Do the brightness test: put on your shield, turn on your panel, close your eyes. You should see near-total darkness. If you see bright red glow seeping in from the edges, you have gaps.
Fix this with better-fitting shields or add foam padding to seal the edges.
Mistake #3: Scratched or damaged lenses
You dropped your shield last week. There's a small scratch. You figure it's no big deal.
Scratches compromise the optical coating. They create focal points. Light can concentrate through even tiny scratches and damage the exact spot on your retina that the scratch directs light toward.
Replace scratched shields. Don't risk your vision to save $50.
Mistake #4: Assuming closed eyes are enough
Your eyelids are thin. Really thin. Light penetrates them easily.
Studies show eyelids provide only OD 1-2 protection. That blocks 90-99% of light. Sounds good until you realize 1% of a high-intensity beam is still intense.
For facial treatments, closed eyes alone are not sufficient protection. Use a proper shield.
Mistake #5: Using outdoor sunglasses
Sunglasses block UV (200-400nm). Red light is 630-850nm. Different spectrum entirely.
Sunglasses actually transmit red and NIR very efficiently. That's why you can see normally while wearing them. They're doing nothing to protect you from red light therapy wavelengths.
Mistake #6: Buying based on price alone
The cheapest option is rarely the right option.
A $15 pair of tinted safety glasses gives you maybe OD 2 protection. A $60 pair of purpose-built red light goggles gives you OD 5. That's 1,000 times more protection.
Your eyesight is worth more than the $45 difference.
Mistake #7: Sharing shields without cleaning
You use your shield. Your partner uses your shield. Back and forth without cleaning.
Oils, bacteria, and skincare residues transfer between users. This can cause eye infections or skin irritation around the eye area.
Either get individual shields or clean thoroughly between users with optical-safe disinfectant.
Mistake #8: Storing shields improperly
You leave your shield sitting on the windowsill where it gets direct sunlight for hours every day.
UV exposure degrades lens coatings. Heat warps frames. Your $70 shield becomes a $5 piece of warped plastic.
Store shields in a case, in a drawer, away from heat and UV.
When you can skip eye protection {#skip-protection}
Not every session requires shields. Here's when you can go without.
Body panel treatments
If you're treating your back, you're likely standing or sitting with your back to the panel. Your eyes are facing away. No direct exposure, no need for shields.
Same for leg, arm, or torso treatments where your face is not in the beam path.
Caveat: watch for reflections. If your treatment room has mirrors, shiny surfaces, or light-colored walls, you can get significant reflected exposure. Either move the reflective objects or use shields.
Low-power devices at distance
If you're using a small 20-30 mW/cm² device at 18+ inches distance for non-facial treatments, the intensity at your eyes is minimal.
Example: using a small red light panel for shoulder treatment while sitting in a chair. The panel is 2 feet away, aimed at your shoulder, and you're looking at your phone. Minimal eye exposure.
You still shouldn't stare at the LEDs, but you don't need shields.
Very short exposures
If you're doing a quick 2-3 minute spot treatment, the cumulative exposure is low even without shields.
But be honest with yourself. "Quick spot treatments" have a way of becoming 15-minute sessions. If you're consistently doing treatments, use shields.
Panel position testing and setup
When you're positioning your panel, checking angles, or adjusting distance, you need to see what you're doing. It's fine to have the panel on without shields for 30 seconds while you get set up.
Just don't linger. Get positioned, put on your shields, then start the actual treatment.
Red-only (no NIR) low-power devices
If you have a visible-red-only device (660nm with no 850nm), and it's low power (under 30 mW/cm²), and you're treating areas away from your face, you can probably skip shields.
Your natural pupil constriction + looking away from the direct beam is usually sufficient for this scenario.
But if you feel any eye strain, see spots, or get headaches, add shields. Your eyes are telling you something.
DIY vs commercial eye shields {#diy-vs-commercial}
Can you make your own eye protection? Should you?
DIY options that actually work
Welding shade insert method:
Get a shade 5-6 welding filter (the flat insert kind, not full welding helmets). Mount it in a frame or goggle body. Add side shields from safety glasses.
Pros: Blocks red and NIR effectively, cheap ($15-25 total) Cons: Very dark, hard to see through, awkward to build
This works but requires some fabrication skills. You need to ensure no gaps and secure mounting.
Stacked theater gel method:
Layer multiple sheets of red/orange theater lighting gel (Roscolux or Lee Filters) to achieve higher OD.
Pros: Inexpensive, easy to test different combinations Cons: Not designed for eye protection, unknown OD ratings, can melt or degrade
This is not recommended for regular use. Theater gels are for lighting effects, not ocular safety. The OD ratings are unverified and inconsistent.
DIY options that don't work
Multiple sunglasses stacked: Still blocks wrong wavelengths. More sunglasses don't help.
Red cellophane or plastic sheets: Negligible OD, no side protection, no optical quality.
Tinted swim goggles: Wrong wavelength filtering, poor optical quality.
Covering eyes with hands: Better than nothing for emergencies, but not adequate for regular sessions.
Why commercial is usually better
Commercial shields are tested. You get verified OD ratings at specific wavelengths. You get warranty coverage. You get proper fit.
The $50-80 you spend on quality commercial shields buys peace of mind. You're not wondering if your DIY solution is actually protecting your eyes.
That said, if you're mechanically inclined and can source proper welding filters with known shade ratings, a DIY build can work as a budget option. Just don't use theatrical gels or random tinted plastic.
Hybrid approach
Some users buy commercial shields but modify them for better fit. Adding extra foam padding, adjusting straps, or attaching them to a headband for hands-free use.
This is fine as long as you don't alter the lenses themselves. Don't drill holes, sand surfaces, or apply coatings. You'll compromise the optical filtering.
Maintenance and care {#maintenance}
Your shields will last for years if you treat them right. They'll last weeks if you don't.
Daily cleaning routine
After each session:
- Rinse lenses with lukewarm water to remove dust and debris
- Apply optical cleaning solution (not window cleaner, not all-purpose cleaner)
- Wipe gently with microfiber cloth in circular motion
- Clean frame and straps with damp cloth
- Air dry completely before storing
Don't use paper towels. Don't use your shirt. Don't use compressed air. All of these can scratch optical coatings.
Deep cleaning (weekly)
Once a week or after particularly sweaty sessions:
- Disassemble removable foam padding
- Wash padding with mild soap and water, rinse thoroughly
- Clean frame joints and hinges with cotton swab
- Check straps for wear or fraying
- Let everything dry completely (24 hours for foam)
- Reassemble and store
What to avoid
Never use these on your shields:
- Ammonia-based cleaners (Windex, etc.)
- Alcohol-based cleaners
- Acetone or paint thinners
- Abrasive cleaners
- Hot water over 110°F
- Dishwashers or washing machines
These will destroy optical coatings, warp frames, or degrade foam.
Storage best practices
Keep shields in a hard case when not in use. Soft pouches don't protect against crushing or drops.
Store in a cool, dry place away from direct sunlight. UV exposure degrades lens coatings over time.
Don't store near your red light device. The device generates heat, and prolonged heat exposure warps plastic frames.
If you have multiple shields, label them. Don't mix up your OD 3 shields with your OD 5 shields.
When to replace
Replace your shields if you notice:
- Scratches or cracks in lenses
- Warped or bent frames
- Degraded foam padding that doesn't seal properly
- Stretched or broken straps
- Yellowing or discoloration of lenses
- Reduced comfort or fit
Optical coatings degrade over time even with perfect care. If your shields are 3-4 years old and you use them daily, consider replacing them even if they look fine.
Your eyes deserve fresh protection.
Cost breakdown {#cost-breakdown}
Let's talk about what you'll actually spend.
Budget tier ($15-30)
Basic tinted safety glasses with minimal NIR protection. OD 2-3 at best.
You get: Basic eye coverage, impact resistance, better than nothing
You don't get: Wavelength-specific filtering, high OD ratings, wrap-around coverage, comfort for extended wear
Best for: Very casual users, low-power devices, supplementary protection
Mid-range tier ($40-70)
Purpose-built red light therapy goggles with verified OD ratings.
You get: OD 4-5 protection, dual wavelength coverage, wrap-around design, comfortable fit, carrying case
You don't get: Premium materials, maximum OD ratings, professional-grade durability
Best for: Home users with standard red light panels, daily use
This is the sweet spot for most people.
Premium tier ($80-150)
Professional-grade laser safety goggles or top-tier red light shields.
You get: OD 6+ protection, military-spec materials, tested and certified, replaceable parts, lifetime warranty
You don't get: Much that justifies the extra cost for home use
Best for: Professional clinic use, extremely high-power devices, users who want absolute maximum protection
Professional tier ($150+)
Medical-grade eye protection used in clinical phototherapy settings.
You get: Maximum protection, documentation for insurance/licensing, commercial warranty
You don't get: Better protection than $100 tier for home use
Best for: Clinics, spas, business use
Cost per use calculation
Let's say you buy $60 shields and use them 5 times per week.
- Year 1: $60 / 260 uses = $0.23 per session
- Year 2: $60 / 520 uses = $0.12 per session
- Year 3: $60 / 780 uses = $0.08 per session
Even premium shields become incredibly cheap per use. The upfront cost seems high but the long-term value is excellent.
False economy of cheap shields
A $20 pair of inadequate shields that you replace every 6 months because they're uncomfortable or provide poor protection costs you $40/year.
A $70 pair of quality shields that last 3+ years costs you $23/year.
The cheap option is actually more expensive and gives you worse protection.
Signs you need better protection {#better-protection-signs}
Your body will tell you when your current shields aren't cutting it.
Immediate symptoms during treatment
Seeing bright red glow even with eyes closed and shield on: Your OD rating is too low for your device power. Upgrade to higher OD.
Spots or afterimages during session: Light is getting around the edges. You need better wrap-around coverage.
Eye strain or fatigue during treatment: Your eyes are working too hard to adjust to the light. More protection needed.
Discomfort or urge to open eyes: Either the shield is physically uncomfortable (wrong fit) or your eyes are getting too much exposure (inadequate OD).
Post-treatment symptoms
Seeing spots or floaters for 10+ minutes after session: Significant retinal photostress. Your shields are inadequate. Upgrade immediately.
Headaches within 1-2 hours of treatment: Can indicate eye strain from insufficient protection.
Red or irritated eyes after sessions: Your eyes are getting more exposure than they should.
Difficulty focusing or blurry vision for hours after: Sign of retinal stress. Stop treatments until you get proper shields.
Long-term warning signs
Increased light sensitivity over weeks of treatment: Cumulative damage adds up. Better protection needed.
Changes in night vision: NIR exposure can affect rod cells responsible for low-light vision. This is serious. See an eye doctor and upgrade shields.
Persistent dry eyes: Can be caused by disrupted tear production from light exposure.
Any lasting vision changes: Stop treatments immediately and see an ophthalmologist.
When to see an eye doctor
If you experience any of these, get a professional eye exam:
- Vision changes that last more than 24 hours after treatment
- Persistent spots, floaters, or flashes
- Pain in or around the eyes
- Significant redness or swelling
- Discharge or unusual tearing
Don't wait. Eye damage can be permanent. Red light therapy is beneficial but not worth risking your vision over inadequate eye protection.
Helpful resources
Understanding wavelengths and eye safety
- Red light therapy for joint pain: comprehensive guide covering treatment wavelengths and safety
- Do you need eye protection for red light therapy: detailed analysis of when eye protection is necessary
Related eye protection guides
- Red light therapy goggles: complete guide to goggles vs other protection methods
- Red light therapy glasses: glasses-style eye protection options
- Red light therapy eyes open or closed: eye positioning during treatments
Treatment safety
- Can you do too much red light therapy: overdose risks and cumulative exposure
- How long to do red light therapy: session duration guidelines
External resources
- American Academy of Ophthalmology: Guidelines for phototherapy eye safety
- FDA Center for Devices and Radiological Health: Home-use light therapy device regulations
- ANSI Z87.1-2020: American National Standard for occupational eye protection specifications
- International Commission on Non-Ionizing Radiation Protection (ICNIRP): Guidelines on limits of exposure to broad-band incoherent optical radiation
Frequently asked questions
Do I need different shields for 660nm vs 850nm?
No, but your shield needs to protect against both if your device uses both wavelengths. Most dual-wavelength shields are rated for the entire 630-900nm range. Check the spectral chart to confirm coverage for your specific wavelengths.
Can I use welding goggles for red light therapy?
Some welding shades work, others don't. Welding shade 5-6 filters can block red and NIR effectively, but they're very dark and designed for arc welding, not LED panels. Purpose-built red light shields are more comfortable and allow better visibility during treatment. If you already own welding goggles, check if they're rated for 630-850nm. If not, get proper red light shields.
How do I know if my shield is working?
Put on your shield, close your eyes, and turn on your panel. You should see near-total darkness. If you see bright red glow seeping in, either your OD rating is too low or light is leaking around the edges. Also watch for post-treatment symptoms like spots, afterimages, or eye strain, all signs your protection is inadequate.
Are expensive shields worth it?
The jump from $20 basic glasses to $60 quality goggles is absolutely worth it. You get proper wavelength filtering, verified OD ratings, and comfortable fit. The jump from $60 to $150+ is only worth it if you're using commercial-grade high-power panels or running a professional practice. For home use, mid-range shields ($40-70) offer the best value.
Can I use blue light blocking glasses?
No. Blue light blocking glasses are designed to filter 400-500nm blue light while transmitting red light. They do the opposite of what you need. Don't be fooled by red-tinted blue blockers, they still block blue and transmit red, which means they offer zero protection for red light therapy wavelengths.
Do I need eye protection if I keep my eyes closed?
Yes, for facial treatments. Your eyelids only provide OD 1-2 protection (blocking 90-99% of light). That's not enough for high-intensity panels at close range. NIR light (850nm) penetrates eyelids even more easily than visible red. Always use proper shields when treating your face or any area where your eyes are in the direct beam path.
How often should I replace my shields?
Replace immediately if you notice scratches, cracks, warped frames, or degraded foam seals. Even without visible damage, optical coatings degrade over time. If you use your shields daily, consider replacing them every 3-4 years even if they look fine. Casual users can get 5+ years from quality shields with proper care.
Can I share shields with family members?
Technically yes, but clean them thoroughly between users. Oils, bacteria, and skincare products transfer easily. Use optical cleaning solution and microfiber cloth. Better option: get individual shields for regular users. They're not expensive enough to warrant sharing if it means spreading bacteria or risking improper cleaning.
What OD rating do I need?
For typical home panels (30-100 mW/cm²) treating at 6-12 inches:
- OD 4 at 660nm visible red
- OD 5 at 850nm near-infrared
Higher power devices (100+ mW/cm²) or closer distances need OD 5-6 across both wavelengths. When in doubt, go higher. There's no downside to extra protection except slightly reduced ambient visibility.
Do shields block the therapeutic benefits?
No. Red light therapy works by light hitting your skin and tissues, not your eyes. The therapeutic wavelengths need to reach your skin cells, not your retinas. Wearing eye protection doesn't reduce treatment effectiveness at all. Your skin gets full exposure while your eyes stay protected.
Can I use my shields for other light therapies?
Depends on the wavelengths. Red light shields designed for 630-850nm won't protect you from blue light therapy (450nm), UV phototherapy (290-320nm), or different laser wavelengths. Each wavelength needs specific filtering. Don't assume your red light shields work for other therapies. Check the wavelengths and OD ratings.
What if I accidentally looked at the panel without protection?
If it was brief (under 5 seconds), you're probably fine. Monitor for symptoms like spots, afterimages, or vision changes. If you see any of these, give your eyes a 24-48 hour break from treatments. If symptoms persist beyond 24 hours or worsen, see an eye doctor. Going forward, put shields on before powering on your device to prevent accidental exposure.
The bottom line
Red light nm ocular eye shields aren't optional accessories. They're essential safety equipment.
You wouldn't stare at the sun. You wouldn't look directly into a laser pointer. And you shouldn't expose your eyes to high-intensity LED panels at close range without proper protection.
The science is clear: prolonged exposure to 660nm red light causes photostress. Exposure to 850nm NIR can affect retinal metabolism. Neither causes instant damage at home device power levels, but cumulative exposure adds up.
Why risk it?
Quality shields cost $40-70. They last for years. They're comfortable. They allow you to do facial treatments without worry.
Choose shields with verified OD ratings for your specific wavelengths. Get wrap-around coverage to block stray light. Clean and maintain them properly. Replace them when they show wear.
Your eyes are irreplaceable. Protect them.
Ready to use red light therapy safely and effectively? Start with proper eye protection. Everything else follows from there.