Red light strips for sauna: Complete buyer's guide and installation tips
Everything you need to know about red light strips for saunas. Expert guide to wavelengths, installation, safety, and choosing the right LED strips for your home sauna.
You want the benefits of red light therapy in your sauna.
But where do you start? What wavelengths work? Which strips won't melt at 180°F? And can you really install them yourself without burning your house down?
I've spent months researching red light strips for saunas. Talked to installers. Read the electrical codes. Tested different products. And what I found surprised me.
Most people buy the wrong strips. They don't understand wavelengths. They overpay for marketing hype. Or worse, they install unsafe products that fail within months.
This guide will save you from those mistakes.
What are red light strips for saunas?
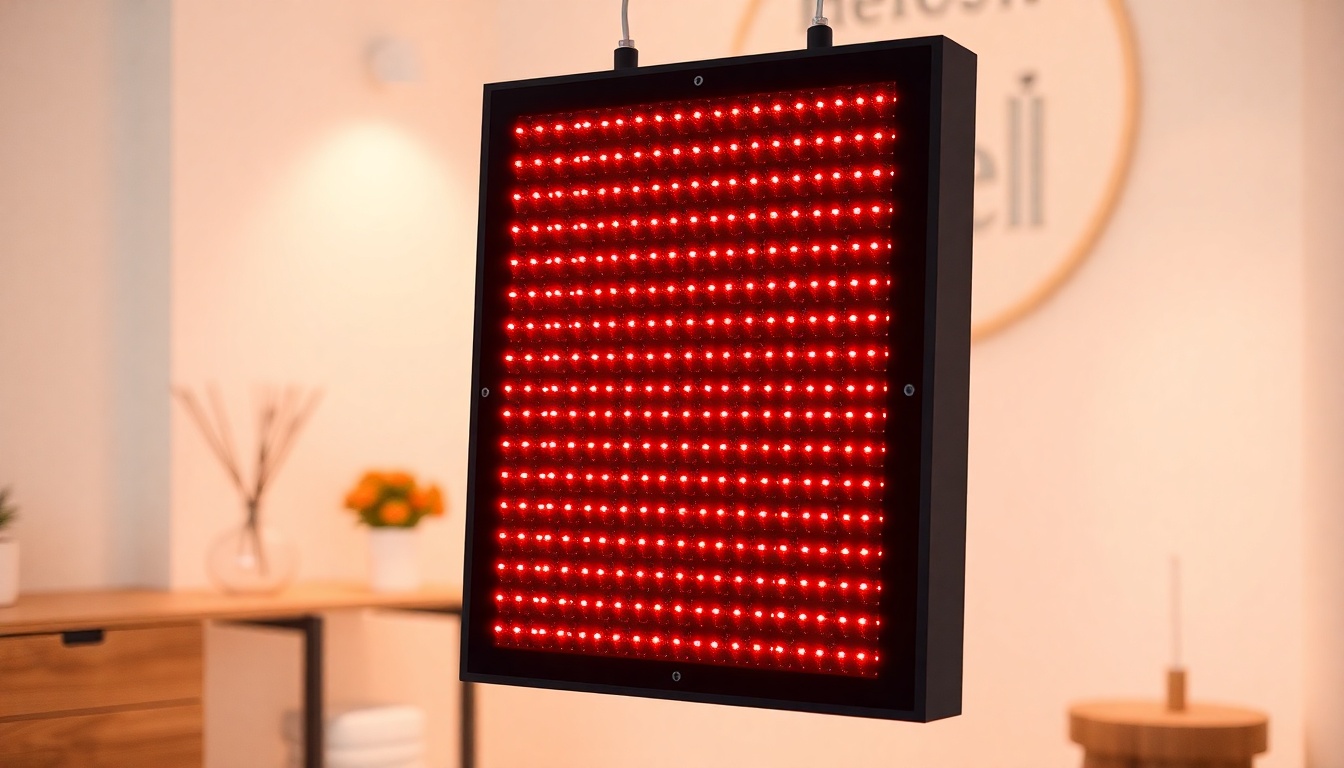
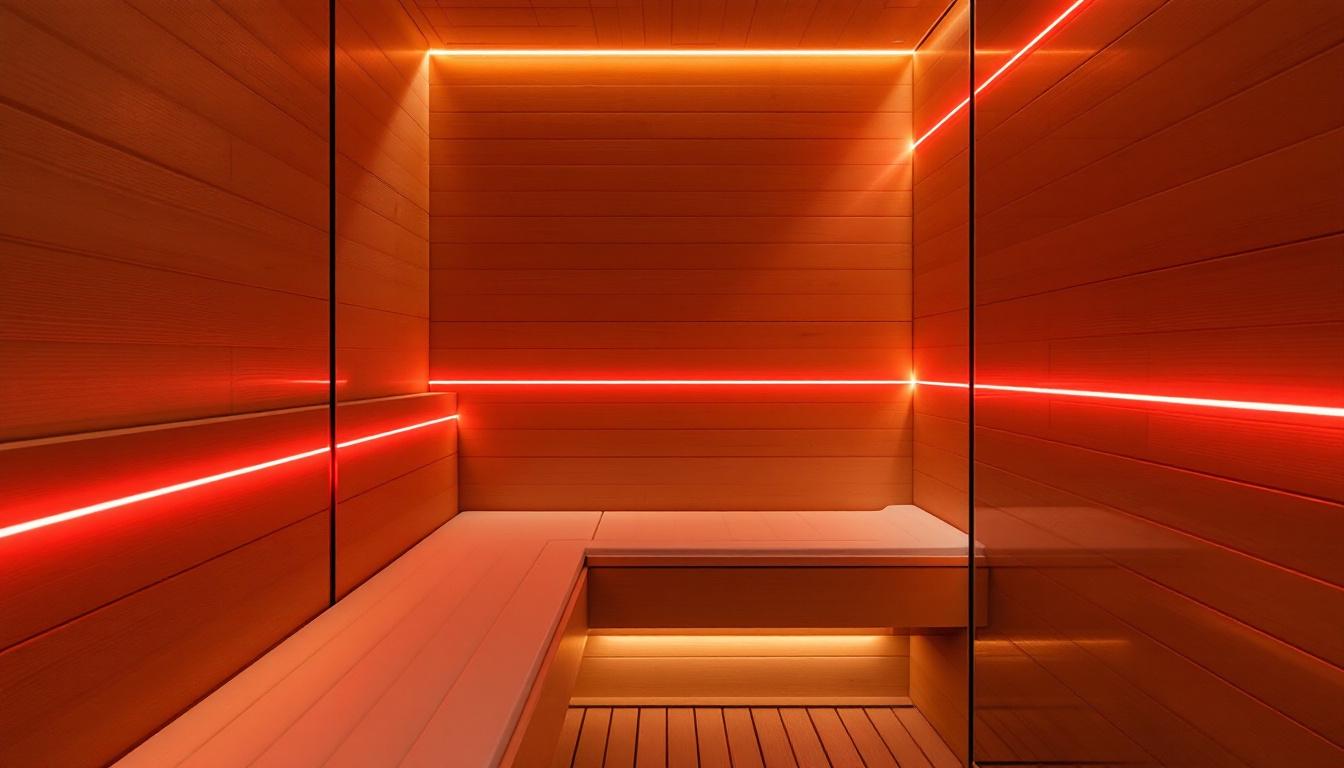
Red light strips are flexible LED lighting systems designed to deliver specific wavelengths of red and near-infrared light in high-heat environments.
They're not regular LED strips. Not even close.
Standard LED strips from Home Depot will fail in a sauna. They're rated for maybe 120°F. Your sauna hits 160-190°F. The adhesive melts. The LEDs dim. The whole thing becomes a fire hazard.
Sauna-specific red light strips use high-temperature components. Heat-resistant LEDs. Silicone adhesives rated to 250°F or higher. Waterproof enclosures that handle humidity.
And here's what most people miss: they're designed for photobiomodulation, not just ambient lighting.
That means specific wavelengths. Usually 660nm (red) and 850nm (near-infrared). Not "reddish" light. Not "warm white" LEDs with red tint. Actual therapeutic wavelengths that penetrate skin and trigger cellular responses.
Why add red light strips to your sauna?
Let's talk benefits. Real ones, not marketing fluff.
You combine two powerful modalities in one session. Heat stress from the sauna triggers heat shock proteins. Red light stimulates mitochondrial function. Together, they create synergistic effects you don't get from either alone.
You maximize your time. A 20-minute sauna session becomes a dual-purpose treatment. Heat + light. Recovery + skin health. All in one sitting.
You enhance blood flow even further. Sauna heat dilates blood vessels. Red light (especially 660nm) does the same thing. The combination delivers more oxygen and nutrients to tissues than either modality alone.
You target skin health at optimal conditions. Your pores open in the heat. Your skin is primed. Red light wavelengths penetrate deeper into hydrated, warm tissue than they do at room temperature.
But here's the thing: these benefits only happen if you use the right wavelengths at sufficient power density.
And that's where most sauna red light setups fail.
The wavelength problem nobody talks about
Walk into a sauna with "red light therapy." You'll probably see red bulbs. Pretty glow. Nice ambiance.
But are they therapeutic?
Usually not.
Red bulbs designed for heating emit broad-spectrum infrared. They're heat lamps, not light therapy devices. They don't concentrate energy at 660nm or 850nm. They don't deliver the photon density needed for photobiomodulation.
You get heat. You don't get the cellular benefits.
Even strips marketed as "red light therapy" often use 630nm or 640nm LEDs. Close, but not optimal. 660nm penetrates deeper and has stronger research backing for skin health, collagen production, and inflammation reduction.
And 850nm? That's near-infrared. Invisible to the eye. You can't tell if it's working by looking at it. You need specs. You need to verify the actual wavelength output.
Here's what to look for:
- 660nm ± 10nm for visible red light (skin, collagen, surface tissue)
- 850nm ± 10nm for near-infrared (deeper penetration, muscle, joints)
- Narrow bandwidth (not broad-spectrum white LEDs with red coating)
- High irradiance (at least 20-40 mW/cm² at 6-12 inches)
If the product doesn't list specific wavelengths, skip it.

Temperature ratings: The make-or-break spec
Your sauna runs hot. 140-190°F depending on whether it's traditional or infrared.
Standard LED strips? Rated to 120°F max. Maybe 140°F for "outdoor" models.
They won't work. They'll dim. They'll fail. The adhesive will melt and the strip will peel off the wall.
You need strips rated for at least 200°F continuous operation. Ideally 220-250°F.
This requires:
High-temperature LEDs. Not all LED chips handle heat. You need semiconductor-grade components designed for harsh environments. Look for specs that explicitly state "high-temperature" or "industrial-grade" LEDs.
Silicone construction. The strip itself should be silicone, not PVC. Silicone handles heat and humidity. PVC gets brittle and cracks.
Heat-resistant adhesive. 3M VHB tape or equivalent, rated to 250°F minimum. Standard adhesive-backed strips use acrylic adhesive that fails at 140-160°F.
Thermal management. Better strips include heat sinks or aluminum backing to dissipate heat. This keeps the LEDs cooler and extends lifespan.
And here's the kicker: even "high-temperature" strips degrade faster in saunas than at room temperature. If the manufacturer claims 50,000 hours at normal temps, expect maybe 20,000-30,000 hours in a sauna environment.
That's still 4-6 years of daily use. But it's not forever.
Waterproof ratings (IP ratings explained)
Saunas are humid. Traditional saunas hit the walls with water when you throw it on the rocks. Infrared saunas still accumulate condensation.
You need waterproof strips. But "waterproof" is marketing speak. The real spec is IP rating.
IP44: Splash-resistant. Not enough for a sauna.
IP65: Water jets from any direction. Minimum for infrared saunas.
IP67: Immersion up to 1 meter for 30 minutes. Better for traditional saunas.
IP68: Continuous submersion. Overkill for sauna use, but if you find strips rated this high, they'll definitely handle humidity.
The IP rating has two numbers:
- First digit: Dust protection (6 is dust-tight)
- Second digit: Water protection (5 = jets, 6 = powerful jets, 7 = immersion, 8 = continuous submersion)
For most home saunas, IP65 is fine. For traditional Finnish saunas where you throw water on rocks and steam billows everywhere, go IP67 or higher.
And don't trust marketing claims. Check the actual IP rating in the specs.

Power density and dosing: How much light do you need?
Here's where things get technical. But stick with me because this determines whether your setup actually works.
Red light therapy depends on joules per square centimeter (J/cm²).
That's total energy delivered to tissue. It's a function of:
- Irradiance (power density in mW/cm²)
- Time (how long you expose the tissue)
- Distance (from LED strip to skin)
Most research shows effective doses between 3-20 J/cm² for skin health, collagen production, and inflammation reduction. More isn't always better. There's a biphasic dose response: too little does nothing, optimal dose works great, too much can inhibit benefits.
So how do you hit that range with LED strips?
Let's say your strips deliver 30 mW/cm² at 6 inches distance. To get 10 J/cm²:
10 J/cm² ÷ 30 mW/cm² = 333 seconds = 5.5 minutes
But in a sauna, you're not standing 6 inches from the wall. You're sitting on a bench. Maybe 12-24 inches from the strips. Irradiance follows the inverse square law: double the distance, reduce power by 75%.
At 12 inches: ~7.5 mW/cm² At 24 inches: ~1.9 mW/cm²
Now your dose calculation changes:
10 J/cm² ÷ 7.5 mW/cm² = 1,333 seconds = 22 minutes
That fits nicely into a typical sauna session. But if you're 24 inches away, you'd need 87 minutes to hit 10 J/cm². Not practical.
Bottom line: You want strips that deliver at least 20-40 mW/cm² at 6 inches. More is better for sauna use where you'll be farther from the source.
And if the product doesn't list irradiance specs? Don't buy it.
How many strips do you need?
This depends on your sauna size and coverage goals.
Small sauna (4x4 feet): 10-16 feet of strips Medium sauna (6x6 feet): 20-30 feet of strips Large sauna (8x8 feet): 40-50 feet of strips
You want even coverage on the walls you'll face while sitting. No need to put strips on the floor or ceiling unless you're going for full-body coverage.
Most people install strips:
- On the back wall (behind where you sit)
- On side walls at torso height
- Optionally under the bench (for leg coverage)
Spacing matters. If you space strips 12-18 inches apart vertically, you get good coverage without gaps. Too far apart and you create hot spots and dead zones.
Layout strategy: Horizontal runs along the wall at shoulder height, chest height, and knee height. This covers your torso, face, and legs while seated.
Skip the ceiling unless you want facial coverage while lying down. Most people don't lie in a sauna, so ceiling strips are overkill.

Installation guide: DIY or hire a pro?
Can you install red light strips yourself?
Yes, if you're comfortable with basic electrical work.
No, if you've never wired anything before.
Here's what's involved:
Step 1: Plan your layout
Measure your sauna walls. Decide where you want coverage. Sketch it out. Calculate total strip length needed.
Remember: strips come in 16-foot reels typically. You'll need to cut and connect sections. Plan cut points at designated spots (usually every 6 inches along the strip).
Step 2: Prepare the surface
Clean the wood thoroughly. Remove any oils, dust, or residue. The better the surface prep, the better the adhesive bond.
For best results: wipe with isopropyl alcohol and let dry completely.
Step 3: Mount the strips
Peel the backing. Press firmly. Hold for 30 seconds at each section.
But here's the trick: don't rely on adhesive alone. Use mounting clips every 12-18 inches. High-temperature clips (aluminum or stainless steel) that screw into the wood. This provides mechanical support even if the adhesive fails.
Step 4: Wire the power supply
This is where most DIYers get nervous.
Red light strips run on low voltage. Usually 12V or 24V DC. You'll need:
- A power supply (transformer) that converts 120V AC to 12V/24V DC
- Wire rated for the amperage (usually 14AWG or 12AWG)
- Connectors to join strip sections
- A switch (optional but recommended)
Critical safety point: The power supply must be OUTSIDE the sauna. Heat will destroy it. Run low-voltage wire from the external power supply into the sauna.
Even more critical: Check local electrical codes. Some jurisdictions require licensed electricians for any permanent wiring. Some allow homeowner installs for low-voltage systems. Know the rules before you start.
Step 5: Test before final installation
Connect everything. Power it on. Check for:
- Even brightness across all strips
- No flickering
- No hot spots or dead sections
- Proper color (should be deep red, not orange or pink)
If you ordered 850nm near-infrared strips, you won't see light. Use your phone camera. Near-infrared shows up as a purplish glow on most smartphone cameras.
Step 6: Seal connections
Any connection points inside the sauna should be sealed with heat-resistant silicone. This prevents moisture intrusion.
Don't skip this step. Moisture + electricity = corrosion and failure.
When to hire a pro
If your sauna is wired for 220V (common for traditional heaters), you need an electrician. Period.
If you're uncomfortable with electrical work, hire someone. The cost ($200-500 for labor typically) is worth avoiding fire hazards or code violations.
And if you're installing in a commercial sauna or gym setting, definitely use licensed professionals. Liability and code requirements are much stricter.

Best wavelength combinations for saunas
You have options when it comes to wavelengths:
Option 1: 660nm only (visible red)
Good for:
- Skin health (collagen, wrinkles, complexion)
- Surface-level inflammation
- Visible verification (you can see it's working)
Not ideal for:
- Deep tissue (muscle, joints)
- Recovery (limited penetration)
Option 2: 850nm only (near-infrared)
Good for:
- Deep tissue penetration (1-2 inches)
- Muscle recovery
- Joint pain
- Systemic effects
Not ideal for:
- Skin-specific benefits (less surface energy)
- Verification (you can't see it)
Option 3: Combo 660nm + 850nm (recommended)
This is what I recommend for most people.
You get both surface and deep tissue benefits. You get visible red light for skin and verification, plus invisible near-infrared for deeper penetration.
Most combo strips offer 50/50 ratios or adjustable ratios. Some let you control each wavelength independently.
Option 4: Full spectrum (red + near-infrared + other)
Some strips include 630nm, 660nm, 810nm, 850nm, and others. The idea is to cover more ground.
But here's the problem: you dilute the power at each wavelength. A strip with 5 different wavelengths delivers less energy at 660nm than a dedicated 660nm strip at the same total wattage.
For sauna use, stick with 660nm + 850nm. It's the sweet spot.
Safety considerations you can't ignore
Red light therapy is generally safe. Saunas are generally safe. Combine them and you're still safe... if you follow basic rules.
Eye protection: Red light (660nm) is bright. It can cause temporary afterimages or mild discomfort if you stare directly at it. Near-infrared (850nm) is invisible, but still delivers energy to the retina.
Do you need goggles? Not for typical sauna use where you're sitting several feet from the strips with eyes closed or looking away. But if you're doing targeted facial treatments with your face close to the strips, yes, use red light therapy goggles.
Heat exposure: The strips themselves don't add significant heat. LEDs are efficient. But they do add some heat. Maybe 5-10°F at most. Not enough to matter in a sauna already running at 160-180°F.
Electrical safety: Low-voltage DC systems are safer than high-voltage AC. But they still need proper installation. No exposed wires. No jury-rigged connections. No power supplies inside the hot sauna box.
Skin sensitivity: Red light + heat + sweat can occasionally cause mild redness or irritation in very sensitive individuals. Start with shorter sessions (10-15 minutes) and work up to longer exposures (20-30 minutes).
Medications and conditions: Some medications cause photosensitivity. Some medical conditions contraindicate heat or light therapy. If you're on medications or have chronic conditions, check with your doctor before combining red light and sauna.
Pregnancy: Heat exposure in saunas is generally not recommended during pregnancy, especially in the first trimester. The red light component is likely safe, but the heat is the concern. If you're pregnant, skip the sauna or consult your OB-GYN first. More on this topic: Is red light therapy safe for pregnancy?

Top brands and products (2026)
Let's cut through the marketing and talk about actual products.
High-end options ($500-1,500)
SaunaSpace Photon Panels
Not strips, but worth mentioning. These are rigid panels specifically designed for sauna use. They use 660nm and 850nm LEDs at high power density (60+ mW/cm² at 6 inches).
Pros: High quality. Tested. Designed for sauna environments. Cons: Expensive. Less flexible than strips (you can't bend them around corners).
Platinum LED BioMax Series
Again, panels rather than flexible strips. But they offer a "sauna kit" that includes mounting hardware rated for high temperatures.
Pros: Strong irradiance. Combo wavelengths (660nm + 850nm). Good reputation. Cons: Pricey. Bulky.
Mid-range options ($200-500)
GembaRed Sauna Strips
Flexible LED strips rated to 220°F. 660nm + 850nm combo. IP67 waterproof. High-temperature silicone construction.
Pros: Flexible. Easy to install. Good specs on paper. Cons: Newer brand (less long-term data on durability).
Mito Red Light Sauna Kit
Includes strips, power supply, and mounting clips. 660nm + 850nm. Rated to 200°F.
Pros: Complete kit. Decent irradiance (25-30 mW/cm² at 6 inches). Cons: Power supply is just okay (some users report failures after 1-2 years).
Budget options ($100-200)
Generic high-temp LED strips from industrial suppliers
You can find high-temperature LED strips designed for industrial ovens or automotive use. Some emit at 660nm.
Pros: Cheap. Available. Cons: Not designed for photobiomodulation (wavelengths may vary). No support. You're on your own for specs and safety.
DIY approach
Buy bare LED chips (660nm and 850nm), high-temp strip backing, soldering tools, and power supplies separately. Build your own.
Pros: Cheapest option if you're handy. Full control over specs. Cons: Time-consuming. Requires electrical knowledge. No warranty.
What I'd buy
If I were outfitting my own sauna, I'd go with GembaRed or Mito Red strips in the mid-range category.
Why? They're purpose-built for sauna use. They have the right wavelengths. They're flexible enough to install in any layout. And the price is reasonable ($250-400 for a full sauna setup).
I'd skip the budget generic strips unless I was willing to do extensive testing and verification. And I'd skip the high-end panels unless money wasn't a concern and I wanted maximum power density.
Common mistakes to avoid
I see the same errors over and over. Don't be that person.
Mistake 1: Buying based on color
Red light looks red. But not all red LEDs emit at 660nm. Some are 625nm (orange-red). Some are 640nm (close but not optimal). Some are white LEDs with a red coating (useless for photobiomodulation).
Always check the wavelength spec. If it's not listed, don't buy.
Mistake 2: Ignoring temperature ratings
"It's only 160°F in my sauna, regular strips should be fine."
No. Regular strips degrade rapidly even below their max temp rating. You need overhead. You need a safety margin.
Use strips rated to at least 200°F, preferably 220-250°F.
Mistake 3: Skipping irradiance calculations
You bought strips. You installed them. But you have no idea if you're getting enough light energy.
Measure or calculate irradiance at your typical sitting distance. Make sure you can hit 3-20 J/cm² in a reasonable session time (10-30 minutes).
Mistake 4: Using indoor-rated power supplies
The power supply (transformer) generates heat. It will fail if you put it inside a hot sauna.
Mount it outside. Run low-voltage wire into the sauna.
Mistake 5: Relying on adhesive alone
Even high-temp adhesive can fail over time with heat cycling (cold to hot, hot to cold, repeat daily).
Use mechanical fasteners. Clips. Screws. Provide backup support.
Mistake 6: No ventilation for electronics
If you do put any controller or dimmer inside the sauna (not recommended, but some people do it), make sure it has ventilation and heat sinks.
Electronics generate heat. Trapped heat kills them faster.
Mistake 7: Forgetting about near-infrared
You install 660nm strips. They look great. Bright red glow.
But you're missing the deep-penetrating benefits of 850nm. Spend the extra $50-100 for combo wavelengths.
Red light strips vs. traditional sauna heaters
Traditional saunas use electric or wood-burning heaters. The heat source emits broad-spectrum infrared (mostly far-infrared in the 3,000-10,000nm range).
This heats the air and your skin. It makes you sweat. It triggers heat shock proteins.
But it's not red light therapy.
Red light therapy uses specific wavelengths (660nm, 850nm) that don't heat significantly but do stimulate cellular responses. Mitochondrial function. ATP production. Nitric oxide release.
You can have both. In fact, combining them is the whole point of red light strips in a sauna.
The sauna heater provides:
- Heat stress
- Sweating and detoxification
- Cardiovascular conditioning
- Relaxation
The red light strips provide:
- Photobiomodulation
- Collagen stimulation
- Inflammation reduction
- Muscle recovery
They're complementary, not competitive.
And here's the bonus: because red light doesn't heat the air, you can use it in infrared saunas that run cooler (120-140°F) without changing the temperature experience.
Red light strips vs. red light panels
Panels are rigid. Strips are flexible.
Panels typically deliver higher irradiance (50-100 mW/cm² vs. 20-40 mW/cm² for strips). They're purpose-built devices with cooling, optics, and optimized LED layouts.
Strips offer flexibility. You can wrap them around corners. Install them under benches. Create custom layouts.
Choose panels if:
- You want maximum power density
- You have a small sauna (one or two panels can cover it)
- You don't mind the rigid form factor
- You're okay with higher cost
Choose strips if:
- You want full-wall coverage
- You have a larger sauna
- You want flexibility in layout
- You're on a tighter budget
Or choose both. Put high-power panels on the back wall for direct exposure. Add strips on side walls for ambient coverage.
That's what some high-end sauna setups do. It's not necessary, but it maximizes coverage and dose.
How to test if your strips are working
You installed the strips. They're glowing red. But are they delivering therapeutic wavelengths?
Here's how to verify:
Test 1: Visual inspection
660nm red light should be deep red, not orange or pink. If it looks orange, it's probably 625nm or 640nm (less optimal).
850nm near-infrared is invisible. Use your smartphone camera. Point it at the strips. You should see a purplish glow on the screen (most phone cameras can detect near-infrared).
Test 2: Spectrometer (if you're serious)
A handheld spectrometer (like the Lighting Passport or similar) can measure actual wavelength output.
Expensive ($300-1,000), but it gives you certainty. You'll see a graph showing peak emission. It should peak at 660nm ± 10nm for red, or 850nm ± 10nm for near-infrared.
Test 3: Irradiance meter
This measures power density (mW/cm²). You hold the sensor at your typical sitting distance and read the output.
Solar power meters work if they're calibrated for red and near-infrared wavelengths. Or buy a dedicated phototherapy meter (also $200-500).
At 12 inches, you should see at least 10-20 mW/cm² for strips. Higher is better.
Test 4: Thermal imaging (for heat, not light)
Point a thermal camera at the strips after 10 minutes of operation. They should be warm but not blazing hot.
If they're running at 150°F or higher, they're overheating and will fail prematurely. Good strips stay under 120°F even in a hot sauna.
Test 5: Skin response
This is subjective but useful. After 2-4 weeks of regular use (3-5 sessions per week), you should notice:
- Skin looks clearer, more even tone
- Minor blemishes heal faster
- Muscle soreness reduces quicker after workouts
- Overall sense of recovery improves
If you notice nothing after a month, either the dose is too low or the wavelengths are wrong.
Maintenance and lifespan
How long do red light strips last in a sauna?
In ideal conditions: 50,000 hours (manufacturer claim).
In sauna conditions: 20,000-30,000 hours realistically.
That's still 10-15 years at 1 hour per day. Or 4-6 years at 2 hours per day.
What kills them:
- Heat cycling (hot to cold, repeat)
- Humidity and moisture intrusion
- Power surges
- Poor installation (mechanical stress on connections)
How to extend lifespan:
Clean the strips every 3-6 months. Wipe with a damp cloth. Remove any buildup or residue. Don't use harsh chemicals (they can degrade the silicone).
Check connections annually. Look for corrosion. Tighten any loose wires. Reseal with heat-resistant silicone if needed.
Inspect adhesive and clips. If a strip is sagging or peeling, re-secure it. Don't let it hang loose (mechanical stress damages the LEDs).
Replace power supplies proactively. If the power supply is 5+ years old, consider replacing it even if it still works. They degrade over time and can fail suddenly.
Monitor brightness. LEDs dim over time. If you notice significant dimming (20-30% reduction), it's time to replace the strips.
And here's a pro tip: buy an extra reel when you first install. Store it sealed in a cool, dry place. When your installed strips eventually fail, you'll have an exact replacement ready to go.
Cost breakdown: What to expect
Let's talk numbers.
Strips themselves:
- Budget: $100-150 for 16 feet
- Mid-range: $200-350 for 16 feet
- High-end: $400-600 for 16 feet
Power supply:
- Basic: $30-50
- Quality: $60-100
- Premium (with dimming, timers): $100-150
Installation materials:
- Mounting clips: $20-40
- Wire and connectors: $15-30
- Heat-resistant silicone: $10-15
Optional:
- Dimmer or controller: $30-80
- Timer or smart switch: $20-50
- Irradiance meter (if you want to verify): $200-500
Labor (if hiring a pro):
- Basic install: $200-400
- Complex install (multiple zones, controls): $400-800
Total for a DIY mid-range setup:
16 feet of quality strips ($250) + power supply ($75) + materials ($50) = $375
For a small sauna, that's it. For larger saunas, double or triple the strip cost.
Total for a professional high-end setup:
32 feet of premium strips ($800) + high-end power/controller ($150) + materials ($75) + labor ($500) = $1,525
So you're looking at $300-1,500 depending on size, quality, and whether you DIY or hire help.
Compare that to a standalone red light therapy panel ($500-1,200) that you'd use separately from your sauna. Adding strips to an existing sauna is often more cost-effective and convenient.
Building a custom sauna with red light from scratch
If you're building a new sauna, you have the perfect opportunity to integrate red light therapy from day one.
Here's how I'd approach it.
Design considerations
Power planning: Run dedicated electrical circuits during construction. One circuit for the sauna heater (usually 220V, 30-40 amps). One circuit for the red light strips (can be 110V, 15 amps).
Keep them separate. Don't share circuits between heating and lighting. When the heater draws full power, you don't want voltage drops affecting your red light strips.
Placement strategy: Map your seating areas first. Then design light placement around where people will actually sit.
Back wall at shoulder height: Primary coverage zone. This is where most people will face while seated. Use the highest-power strips here.
Side walls at chest and knee height: Secondary coverage. Fills in the gaps. Ensures even exposure.
Under-bench placement: For leg and foot coverage. Optional but nice if you have the budget.
Wiring runs: Plan conduit paths during framing. It's much easier to run wires through studs before you install tongue-and-groove cedar paneling.
Entry point: Where will wires enter the sauna? Usually through the floor or ceiling. Plan a neat entry that can be sealed against heat loss.
Exit point: Where will the power supply live? It needs ventilation and should be accessible for maintenance. A small utility closet adjacent to the sauna is ideal.
Moisture barriers: Your sauna needs vapor barriers anyway. Make sure wire entry points don't compromise them. Use silicone sealant around any penetrations.
Switch placement: Install switches OUTSIDE the sauna. Not inside. Heat kills switches faster than you'd think.
A dual switch setup is nice: one for the sauna heater, one for the red light strips. This lets you run them independently.
Material selection for red light integration
Wood choice matters. Light-colored woods (aspen, hemlock, cedar) reflect red light better than dark woods. You get slightly better light distribution and less absorption.
But dark woods work fine too. You'll just need slightly more strips to compensate for absorption.
Avoid reflective foil insulation on walls where you'll mount strips. It creates hot spots and uneven distribution. Standard mineral wool or ceramic fiber insulation is better.
Use smooth interior paneling. Rough-sawn lumber creates shadows and inconsistent light patterns. Smooth tongue-and-groove gives cleaner, more even distribution.
Cost comparison: New build vs. retrofit
New build (integrated red light):
- Electrical rough-in: $200-400 (easier during construction)
- Red light strips and power: $400-800
- Labor (if professional): $300-500
- Total add-on cost: $900-1,700
Retrofit (adding to existing sauna):
- Electrical work: $300-600 (harder to run wires through finished walls)
- Red light strips and power: $400-800
- Labor (if professional): $500-900
- Total retrofit cost: $1,200-2,300
Building it in from the start saves $300-600 compared to retrofitting later.
Plus, the installation is cleaner. No visible wires. No patched walls. Everything integrated from day one.
Red light therapy protocols for sauna sessions
You've got the strips installed. Now what?
How long do you sit there? How often? Eyes open or closed? Before the sauna heats up or after?
Let's build a protocol.
The basic protocol (beginner)
Frequency: 3 times per week Duration: 15-20 minutes total session Timing: Start with red light at low sauna heat (120-140°F)
Week 1-2:
- Heat sauna to 130°F
- Enter and turn on red light strips
- Sit comfortably 18-24 inches from the back wall
- Relax, close eyes or use goggles if facing strips directly
- 15 minutes total
- Exit and cool down
Week 3-4:
- Increase temperature to 150°F
- Same protocol but extend to 20 minutes
- Monitor how you feel
This eases you into the combined heat + light stress. Your body adapts. You learn your tolerance.
The advanced protocol (experienced users)
Frequency: 4-5 times per week Duration: 25-30 minutes Timing: Full heat with red light throughout
Session structure:
- Heat sauna to 160-180°F (traditional) or 130-150°F (infrared)
- Enter and activate red light strips
- First 10 minutes: Face the back wall strips directly for facial and upper body exposure
- Middle 10 minutes: Turn to the side or alternate sides for full torso coverage
- Final 5-10 minutes: Lie down if your sauna has a bench long enough (full body coverage)
- Cool down with cold shower or outdoor air
This maximizes coverage and dose across your entire body.
The targeted protocol (specific goals)
For skin health (anti-aging, collagen, acne):
- Focus red light exposure on face and décolletage
- Sit or position yourself 12-18 inches from strips
- 660nm wavelength primary (850nm secondary)
- 15-20 minutes, 4-5 times per week
- Lower sauna heat (130-150°F) to avoid excessive sweating on face
For muscle recovery (post-workout):
- Position sore muscle groups near strips
- 850nm wavelength primary (660nm secondary)
- Higher sauna heat (160-180°F) for additional blood flow
- 20-30 minutes, ideally within 2 hours post-workout
- 3-4 times per week on workout days
For joint pain (arthritis, chronic issues):
- Direct red light at affected joints (knees, shoulders, hips)
- Combo 660nm + 850nm for surface and deep penetration
- Moderate heat (150-170°F)
- 25-30 minutes
- Daily use is safe; start with 3x per week and increase as tolerated
For sleep and circadian rhythm:
- Evening sessions (6-8pm)
- 660nm only (bright red visible light)
- Lower heat (120-140°F) to avoid over-stimulation before bed
- 15-20 minutes
- 3-4 times per week
- Avoid 850nm near-infrared in evening sessions (may be too stimulating)
Timing: Before, during, or after sauna heat?
You have three options:
Option 1: Red light BEFORE heating
- Turn on strips while sauna is still cool or warming up
- Get 10-15 minutes of pure red light therapy
- Then add heat for the final 10-15 minutes
- Benefit: Separates the modalities, easier to track individual effects
Option 2: Red light DURING full heat (recommended)
- Heat sauna to target temp
- Enter with red lights on
- Full 20-30 minute session with both heat and light
- Benefit: Synergistic effects, time-efficient, enhanced blood flow
Option 3: Red light AFTER heat
- Full sauna session with heat only
- Cool down slightly (to 120-130°F)
- Turn on red lights for final 10-15 minutes
- Benefit: Red light without intense heat stress, good for sensitive individuals
Most people prefer Option 2. It's efficient and maximizes the synergistic benefits.
But if you find the combined heat + light too intense, try Option 1 or Option 3.
Combining red light with other sauna enhancements
Red light strips aren't the only upgrade you can add to a sauna. Let's talk stacking.
Chromotherapy (color therapy) + red light
Some saunas include RGB LED systems for chromotherapy. Different colors (blue, green, yellow) for different moods or effects.
Can you use chromotherapy and red light together?
Yes, but not simultaneously. Chromotherapy uses broad-spectrum colored light that doesn't deliver therapeutic wavelengths. It's for ambiance and mood, not photobiomodulation.
Run them separately:
- Red light therapy strips during the main session (therapeutic)
- Chromotherapy RGB during cool-down (relaxation and mood)
Halotherapy (salt therapy) + red light
Halotherapy involves breathing pharmaceutical-grade salt aerosol. Some high-end saunas integrate halogenerators.
Red light and salt therapy work well together. Salt supports respiratory health. Red light supports cellular function and skin health. No conflicts.
You can run both simultaneously.
Aromatherapy + red light
Essential oils (eucalyptus, lavender, pine) are common sauna additions. Drip them on hot rocks or use a sauna diffuser.
No conflict with red light. Just make sure any aromatherapy device (diffuser, vaporizer) doesn't block your red light strips or create uneven heat distribution.
Sound therapy (music, binaural beats) + red light
Many people listen to music or meditation tracks in the sauna.
Red light doesn't interfere with sound. Combine freely.
A nice setup:
- Waterproof Bluetooth speaker mounted outside the sauna
- Red light strips for photobiomodulation
- 432Hz music or binaural beats for relaxation
Cold therapy (contrast therapy) + red light
Contrast therapy alternates hot and cold exposure. Sauna + cold plunge or cold shower.
Does red light fit into this?
Absolutely. Red light supports recovery from both heat and cold stress.
Protocol:
- Red light sauna session (20 minutes, full heat)
- Cold plunge or shower (2-5 minutes)
- Rest (5 minutes)
- Optional second round
The red light doesn't interfere with the hot/cold contrast. It adds a photobiomodulation layer on top.
Real-world results: What to expect (and what not to expect)
Let's set realistic expectations.
Red light therapy in a sauna isn't magic. It won't cure chronic disease. It won't replace medical treatment. And it won't transform your life in a week.
But it can deliver measurable, meaningful benefits over time.
Timeline for noticeable effects
Week 1-2:
- Not much. Maybe a subtle sense of relaxation. Possibly better sleep.
- This is normal. Photobiomodulation effects are cumulative.
Week 3-4:
- Skin may start to look clearer, more even tone
- Minor blemishes or acne may heal faster
- Muscle soreness after workouts may reduce slightly
Week 6-8:
- Noticeable skin improvements (smoother, more radiant)
- Faster recovery from exercise
- Better mood and energy (subjective but common)
- Chronic pain (if present) may start to improve
Week 12+:
- Long-term collagen production (fine lines, skin elasticity)
- Sustained improvements in recovery and inflammation
- Benefits plateau but remain stable with continued use
This assumes consistent use (3-5 sessions per week, proper dose, correct wavelengths).
If you're inconsistent (once a week, skipping weeks), it'll take longer. If your dose is too low or wavelengths are wrong, you might not see benefits at all.
What red light in the sauna CAN help with
Based on research and anecdotal reports:
Skin health: Collagen production, wrinkle reduction, acne healing, scar healing, complexion improvement, skin elasticity.
Muscle recovery: Reduced soreness (DOMS), faster recovery from intense workouts, improved muscle endurance over time.
Joint health: Reduced pain and stiffness in arthritis, improved range of motion, decreased inflammation in chronic joint conditions.
Inflammation: Systemic inflammation reduction (measured by markers like CRP), localized inflammation in injuries.
Circulation: Improved blood flow, better oxygen delivery to tissues, enhanced nutrient transport.
Mood and energy: Better sleep quality, improved mood (possibly via increased mitochondrial function), higher subjective energy levels.
Wound healing: Faster healing of minor cuts, abrasions, surgical incisions.
What red light in the sauna CANNOT do
Let's be honest about limitations:
It won't replace exercise. Red light supports recovery. It doesn't build muscle or burn fat on its own.
It won't cure serious disease. Photobiomodulation is supportive therapy, not primary treatment. If you have a medical condition, see a doctor.
It won't work instantly. This isn't a pill. Effects accumulate over weeks and months.
It won't overcome bad habits. If you eat poorly, sleep 4 hours a night, and never exercise, red light won't fix that.
It won't deliver uniform results. Some people respond strongly. Others see modest benefits. Genetics, lifestyle, and health status all play a role.
Tracking your results
How do you know if it's working?
Take photos. Before/after pictures of your skin (face, problem areas) every 2 weeks. Compare at 8-12 weeks.
Track recovery. Note muscle soreness levels after workouts (1-10 scale). See if it trends down over 4-8 weeks.
Measure pain. If you have chronic joint pain, rate it daily (1-10 scale). Look for trends over 6-12 weeks.
Monitor sleep. Use a sleep tracker or journal. Note quality and duration. Compare before/after starting red light sauna sessions.
Skin assessment. Check for: fewer breakouts, smoother texture, more even tone, improved elasticity (pinch test).
Don't rely on memory. Memory is unreliable. Track objectively.
Environmental considerations and energy costs
Red light strips consume electricity. So do sauna heaters.
How much does this add to your power bill? And what's the environmental impact?
Power consumption breakdown
Typical sauna heater:
- Electric: 4-6 kW (4,000-6,000 watts)
- Run time: 30-45 minutes per session (including preheat)
- Energy per session: 2-4.5 kWh
Red light LED strips:
- Power: 15-50 watts per meter (depending on LED density and wavelength)
- Total for 10 meters (33 feet): 150-500 watts
- Run time: 20-30 minutes per session
- Energy per session: 0.05-0.25 kWh
Total energy per session:
- Sauna heater: 2-4.5 kWh
- Red light strips: 0.05-0.25 kWh
- Combined: 2.05-4.75 kWh
The red light strips add only about 2-5% to the total energy consumption. Negligible compared to the heater.
Monthly cost estimate
Assume 4 sessions per week, average 3 kWh per session, electricity cost $0.15/kWh (US average):
Monthly cost:
- Sessions per month: 16
- Energy per month: 16 × 3 = 48 kWh
- Cost: 48 × $0.15 = $7.20
Of which:
- Sauna heater: ~$7.00
- Red light strips: ~$0.20
The red light strips cost about 20 cents per month to operate. Less than a cup of coffee.
Energy efficiency tips
Use a timer. Don't leave strips on when not in use. A simple outlet timer ($15) can automate this.
Preheat efficiently. Heat the sauna to temperature, then enter and turn on red lights. Don't run red lights during empty preheat time.
Insulate well. A well-insulated sauna heats faster and uses less energy. This affects the heater, not the lights, but it's still important.
Choose efficient strips. Higher-quality LED strips deliver more light per watt. Cheaper strips waste more energy as heat.
Carbon footprint
If you care about environmental impact:
LEDs are among the most efficient light sources. They convert 80-90% of energy into light (vs. 20-30% for incandescent bulbs).
A home sauna session with red light strips emits roughly 1-2 kg CO₂ (depending on your grid's energy mix).
For comparison:
- Driving 5 miles: ~2 kg CO₂
- Streaming Netflix for 2 hours: ~0.5 kg CO₂
- Running central AC for 1 hour: ~1-3 kg CO₂
It's not zero impact. But it's not significant compared to other household energy use.
If you want to offset:
- Use renewable energy (solar panels, green energy plan)
- Limit session frequency (3x/week vs. daily)
- Combine modalities (get heat + light + meditation in one session instead of separate activities)
Troubleshooting common issues
Things go wrong. Strips fail. Power supplies die. Let's diagnose and fix.
Problem: Strips dim or flicker
Possible causes:
- Voltage drop (wires too thin or too long)
- Failing power supply
- Loose connections
- LED degradation
Solutions:
- Check connections: tighten all terminals
- Measure voltage at the strip (should be 12V or 24V, whatever it's rated for)
- If voltage is low, check wire gauge (use 14AWG or thicker for runs over 20 feet)
- Replace power supply if it's 3+ years old
- If LEDs are degraded (10,000+ hours of use), replace the strip
Problem: Strips overheat and fail prematurely
Possible causes:
- Ambient sauna temp too high (above strip rating)
- Poor heat dissipation (no air gap behind strip)
- Overcurrent (power supply voltage too high)
Solutions:
- Verify strip temperature rating vs. sauna operating temp
- Mount strips with small air gap (use spacers or clips that lift the strip 1/4 inch off the wall)
- Check power supply output voltage (use a multimeter)
- Consider running sauna at slightly lower temp (160°F vs. 180°F)
Problem: Adhesive fails and strips peel off
Possible causes:
- Surface wasn't clean when installed
- Adhesive not rated for high temp
- Humidity degraded adhesive over time
Solutions:
- Remove strip, clean wall and back of strip with isopropyl alcohol
- Apply new high-temp adhesive (3M VHB tape rated to 250°F)
- Install mechanical fasteners (clips every 12 inches) as backup
- Let adhesive cure 24 hours before exposing to heat
Problem: Uneven brightness across the strip
Possible causes:
- Voltage drop along the length of the strip
- Defective LED sections
- Poor solder joints at connection points
Solutions:
- Feed power from both ends of long strips (instead of one end)
- Use thicker wire to reduce voltage drop
- Replace defective sections (if strip is cuttable and connectable)
- Return/replace if under warranty
Problem: No visible light from 850nm near-infrared strips
This is normal. 850nm is invisible to the human eye.
Verification:
- Use smartphone camera (you should see purplish glow)
- Check irradiance meter (if you have one)
- Verify power consumption (if strips draw rated wattage, they're working)
If your phone camera shows nothing and power consumption is zero, the strips aren't working. Check power supply and connections.
Problem: Strips work but I don't feel/see benefits
Possible causes:
- Wavelength is wrong (not 660nm or 850nm)
- Irradiance too low (you're too far from the strips)
- Session time too short
- Inconsistent use (1x/week isn't enough)
- Unrealistic expectations (it's not magic)
Solutions:
- Verify wavelength specs (check product documentation or use spectrometer)
- Calculate irradiance at your sitting distance, adjust distance or add more strips
- Increase session time to 20-30 minutes
- Commit to 3-5 sessions per week for 6-8 weeks
- Track objectively (photos, metrics) instead of relying on subjective feeling
Frequently asked questions
Can I use regular LED strips in my sauna?
No. Regular LED strips aren't rated for sauna temperatures (140-190°F) or humidity. They'll fail quickly. Use strips specifically rated for high-temperature environments (200°F minimum).
Do red light strips make the sauna hotter?
Slightly, but not noticeably. LEDs are efficient and produce minimal heat. You might see a 2-5°F increase at most. Your sauna heater is doing 99% of the heating work.
Can I install red light strips in an infrared sauna?
Yes. Infrared saunas run cooler (120-150°F typically), so heat stress on the strips is less than in traditional saunas. Just make sure the strips are still rated for the temperature and humidity.
How close should I sit to the strips?
For optimal dose, 12-24 inches is ideal. Closer gives higher irradiance but covers less body area. Farther gives lower irradiance but covers more area. Most people find 18 inches to be the sweet spot.
Can I use red light strips without the sauna heater?
Absolutely. You can turn on just the red light strips for a light therapy session without heat. Useful if you want the photobiomodulation benefits without sweating or if it's hot outside.
Do I need eye protection?
Not for typical use where you're sitting several feet away with eyes closed or looking away. But if you're doing close-up facial treatments, consider red light therapy goggles to protect your eyes.
What's better: 660nm or 850nm?
It depends on your goals. 660nm is better for skin (collagen, wrinkles, surface healing). 850nm is better for deep tissue (muscle, joints, systemic effects). A combo of both is ideal for most people. For more details, see our guide on red light vs infrared light.
How often should I use red light in the sauna?
3-5 times per week for 15-25 minutes is a good starting point. Daily use is safe but not necessarily more effective due to biphasic dose response. Some benefits plateau or even reverse with excessive exposure.
Can I dim the strips?
Yes, if you use a compatible dimmer. But be aware that dimming reduces power density and therefore increases the time needed to hit your target dose. If you dim to 50%, you need twice as long for the same effect.
Will red light therapy help with sauna detox?
Red light doesn't directly detoxify. But it supports cellular health, mitochondrial function, and circulation, which can support the body's natural detox processes. The sauna heat is doing most of the detox heavy lifting through sweating.
What about tanning? Will red light strips tan my skin?
No. Red light (660nm) and near-infrared (850nm) don't trigger melanin production the way UV light does. You won't tan from red light therapy. For more on this, check out does red light therapy tan you?
Can I combine red light strips with red light tanning beds?
Red light tanning beds are different devices that combine UV tanning with some red light. They're not the same as pure red light therapy strips. You can use both, but they serve different purposes. More details here: red light tanning beds.
Putting it all together
Red light strips for saunas combine two powerful wellness modalities: heat therapy and photobiomodulation.
But only if you do it right.
Use the right wavelengths (660nm and 850nm). Choose strips rated for high temperature (200°F minimum) and humidity (IP65 or higher). Calculate your dose to ensure you're getting 3-20 J/cm² in a practical session time. Install safely with proper electrical wiring and mechanical support.
And don't fall for marketing hype. Verify specs. Test your setup. Monitor results.
When you get it right, you'll notice the difference. Skin looks better. Recovery feels faster. You're maximizing every minute you spend in the sauna.
That's the goal. That's what red light strips make possible.
This article is for educational purposes only and is not medical advice. Consult with a healthcare provider before starting any new therapy regimen, especially if you have medical conditions or take medications.
Helpful resources
Want to learn more about red light therapy and sauna wellness? Check out these related guides:
- Red light therapy goggles: Complete guide to eye protection for red light therapy
- Red light therapy eyes open or closed: Should you keep your eyes open during red light sessions?
- Red light tanning beds: Everything you need to know about hybrid tanning beds with red light therapy
- Is red light therapy safe for pregnancy?: Safety guidelines for expectant mothers
- Red light vs infrared light: Understanding the difference between wavelengths
External resources
- Photobiomodulation research database (PubMed Central)
- American Sauna Society (sauna safety and best practices)
- LED lighting standards (US Department of Energy)
The Truman Show moment: If you've read this far, you're serious about optimizing your sauna setup. You're not here for quick hacks or magic bullets. You want to understand wavelengths, calculate doses, and build something that actually works. That mindset will serve you well. Most people buy the cheapest option, install it wrong, and wonder why they don't see results. You're not most people. Now go build your red light sauna the right way.